Scripts Editor
Overview
The Scripts Editor option provide access to the main functions available for managing platform scripts. It is a browser-based Integrated Development Environment (IDE) which allows for the creation, validation and management of platform scripts.
The Scripts Editor menu currently has just one option: Open. Click Open to access the Scripts Editor page.
Scripts Editor page
Use the Scripts Editor page to manage, validate, and run platform scripts from Workbench.
Scripts Editor page UI elements
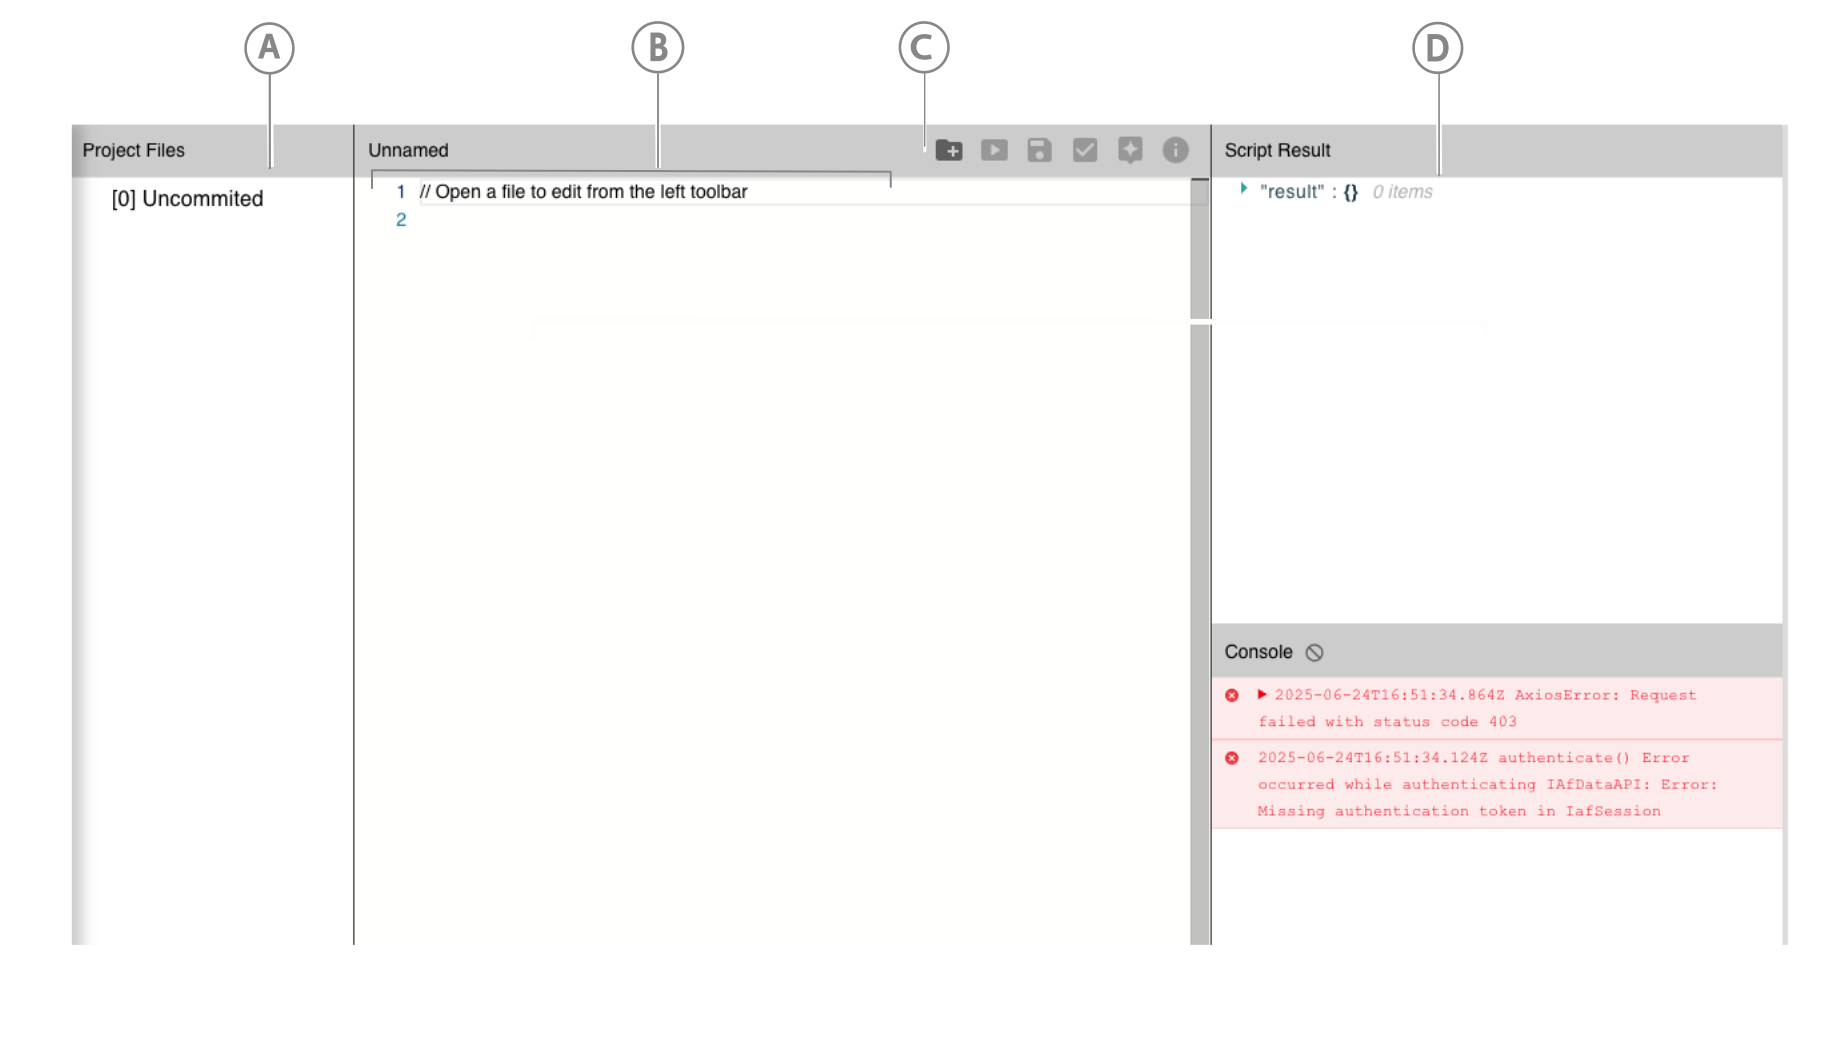
Refer to the figure below which points out the main UI elements on the Scripts Editor page. Refer to the table below for explanation of each of the elements.
Figure: Scripts Editor page UI elements
| Callout | UI element name | Description |
|---|---|---|
| A | Project Files side-bar | The left side-bar lists all files currently committed in the project as well as a selection that lists uncommitted scripts. |
| B | Script listing area | The main central area lists the current script. It opens with a blank script template. |
| C | Top menu icons | The top menu lists a series of icons for actions such as Add New File and Execute Script. See Top menu actions below for more details. |
| D | Script Result/Console side-bar | The right side-bar displays the results (in JSON) of a script execution. It also has a console area which lists details of each script execution. |
Top menu actions
On the Scripts Editor page, there is a top menu which lists a series of icons for the various actions possible on a script. The current range of actions available are:
- Add New File: Use this icon to create a new script file. You will need to enter details of the file and it will then open a new blank script template.
- Run Script File: Use this icon to parse and execute your script. A dialog will appear which will allow you to select which function should be executed. The results are displayed in JSON in the Script Result panel.
- Save File: Use this icon to save your script and place it into the uncommitted project files.
- Commit File: Use this icon to commit the script file to the project. A dialog will appear which allows you to select which scripts should be committed and if it should be committed to the current version or a new version.
- AI Prompt: Use this icon to avail of the AI code assist feature. A dialog will appear which will prompt you to ask AI for coding assistance. The AI is trained in the Twinit Platform libraries and can assist in generating a code base on Natural Language Processing (NLP).
- Show Script Explanation: Use this icon to display a dialog which explains the code that the AI Prompt has produced.